What Nits Look Like and How to Get Rid of Them
Dealing with a head lice infestation or concerned about one? Understanding what nits look like and how to remove them effectively is crucial. Nits, or lice eggs, are a key component of the lice life cycle and a significant factor in reinfestations. If not removed, viable nits can hatch and restart the infestation cycle. This guide will help you identify nits, locate them on the hair and scalp, and use the best methods for removing them.
What Are Nits?
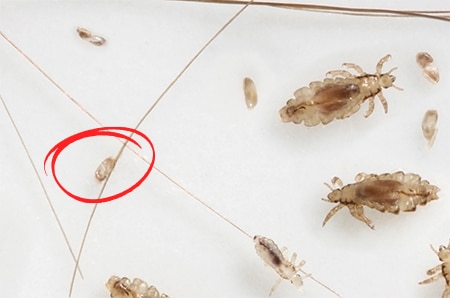
Nits are eggs laid by female head lice and are essential to lice reproduction. A female louse can lay up to 10 nits per day, and it usually takes about 7-10 days for them to hatch. If left untreated in a 30-day lifespan a louse can lay up to 100 eggs in her lifetime.
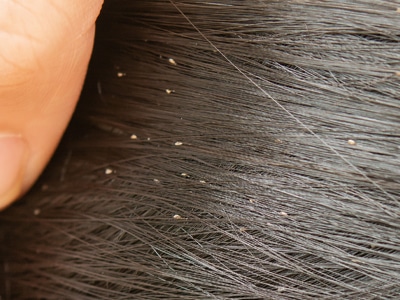
Nits are tiny, oval-shaped specks that are typically yellow or white and are firmly attached to individual hair strands close to the scalp, approximately 1.5 cm. They are similar in size, shape, and color of a sesame seed.
These eggs can easily be mistaken for dandruff or hair debris. However, unlike dandruff, nits are not easily removed by shaking or brushing the hair. Nits are attached to hair shafts with a glue-like substance secreted by the female louse, making them challenging to dislodge, especially when firmly attached to the base of the hair.
Where to Find Nits on the Hair and Scalp
Nits are usually found close to the scalp, where they receive the warmth needed to incubate and hatch. Common locations for nits include:
- Behind the ears
- Along the hairline on the neck
- On the crown of the head
To search for nits, follow these steps:
- Apply Conditioner: Apply conditioner to help detangle the hair.
- Section the Hair: Comb the hair into small sections to make it easier to inspect.
- Inspect Close to the Scalp: Look for the eggs about ¼” from the scalp. A magnifying glass can help you see the tiny eggs more clearly.
- Test the Spec: If you find a spec, tug on it with your fingertips to see if it sticks or flakes off easily. Remember, dandruff dances and nits stick.
By following these steps, you can thoroughly inspect the hair and ensure you identify all nits for effective removal.
Can You Pop Nits?
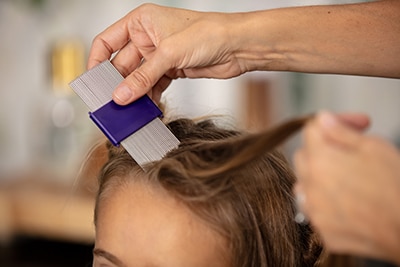
Attempting to pop or crush nits is not recommended and does not indicate whether they are alive. Since you cannot determine the viability of a nit by popping it, it is best practice to remove all nits from your hair. The key to successfully eliminating nits is to use a fine-toothed lice comb specifically designed for this purpose.
The Licefreee NitDuo Comb
Combing hair after a head lice infestation can be tedious and exhausting. However, with the Licefreee NitDuo comb, you can effectively remove lice and nits and become lice-free in no time. This two-sided comb features:
- A smooth side for less invasive combing
- A grooved side to help tackle even the toughest nits
- Top Tip: Applying conditioner to the hair before combing can help the comb glide more smoothly. Any conditioner can be used for this purpose; our favorite scent is coconut!
Cleaning Your Nit Comb
When using a nit comb, rinse it in water and wipe it off with a paper towel between swipes through the hair. After use, soak the comb in hot soapy water. Licefreee combs can also be sterilized. Bring water to a boil, turn off the heat, and place the comb in the hot water for at least 10 minutes. Carefully remove the comb afterward.
Knowing what nits look like and how to remove them effectively is essential for managing a lice infestation. By using the right tools and techniques, you can eliminate nits and lice from your hair, prevent reinfestations, and achieve a lice-free and healthy scalp.
